Overlay watermark
LabVIEW Image Overlay Example
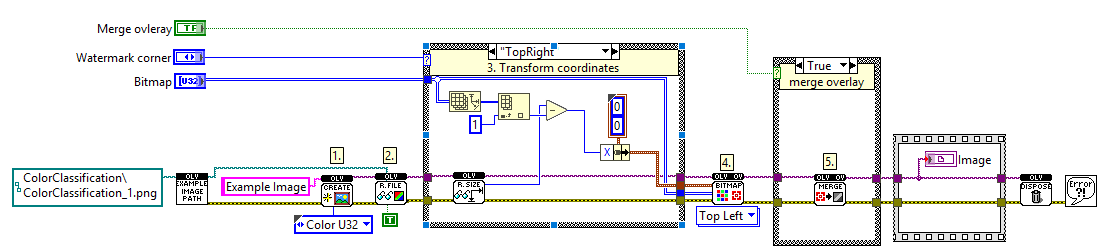
This LabVIEW VI demonstrates how to overlay a bitmap image onto a main image, typically used for watermarking or adding graphical elements.
Create Image Reference: The “OLVCreate” function (1) initializes a new, empty image reference. In LabVIEW, image data is handled by references, meaning the wire carries a pointer to the image data’s location in memory, not the image data itself. This is a crucial distinction, as image references do not adhere to LabVIEW’s standard dataflow paradigm where data is copied between functions.
Read Image File: The “OLVReadFile” function (2) loads an image from the specified file path. When the “UseFilePartImageType” input is set to
TRUE(as indicated by the constant), the appropriate image file format reader is automatically selected, simplifying the loading process.Transform Coordinates for the Overlay
- TopLeft: X = 0, Y = 0
- TopRight: X = Image.Width - Bitmap.Width, Y = 0
- BottomLeft: X = 0, Y = Image.Height - Bitmap.Height
- BottomRight: X = Image.Width - Bitmap.Width, Y = Image.Height - Bitmap.Height
Overlay Bitmap: This step takes the bitmap data and “overlays” it onto the image. Overlays are an extra layer on top of images so the pixel data doesn’t get changed.
Merge Overlay into Image: Finally, the merge operation (5) consolidates the drawn overlay (from step 4) with the main image. This VI embeds a nondestructive overlay directly into the image content, effectively converting it into a destructive (permanent) overlay. Subsequently, the original separate nondestructive overlay is removed. The resulting image is provided in RGB format.