On this page
format_color_fill
Data value reference
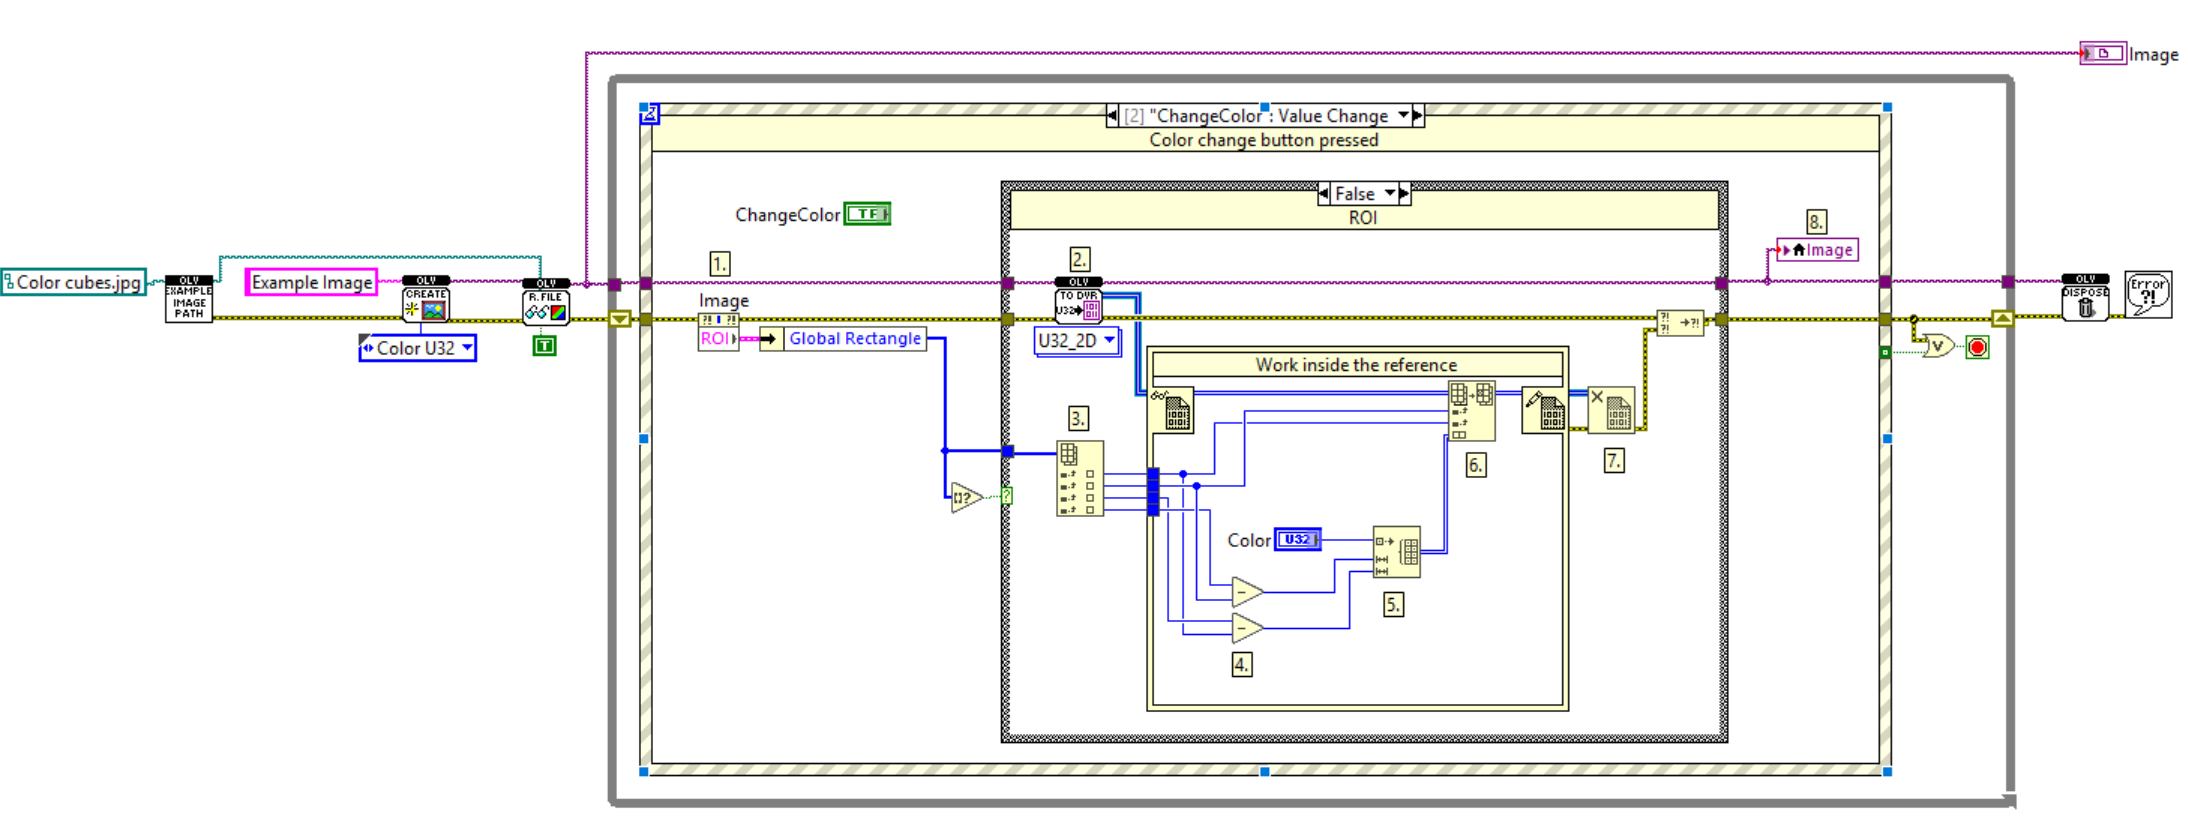
This LabVIEW example demonstrates changing the color within a selected image region (ROI) using an OpenLvVision function and a Data Value Reference (DVR) for efficient in-place pixel modification.
Get ROI from Image Control:
- Retrieves the currently defined Region of Interest (ROI) from the “Image” control.
Create Data Value Reference (DVR):
- The “OLV ImageToDVR” function (2) takes the image reference and returns a Data Value Reference (DVR) to the image data.
- The “Inplace Element Structure” allows direct manipulation of the image data within the DVR without creating a full copy. Only data entering or leaving the structure is copied.
Index ROI Coordinates:
- Indexes the array representing the ROI coordinates. Assuming the ROI is represented as an array of four elements:
- Index 0: Left coordinate of the rectangle.
- Index 1: Top coordinate of the rectangle.
- Index 2: Right coordinate of the rectangle.
- Index 3: Bottom coordinate of the rectangle.
- Indexes the array representing the ROI coordinates. Assuming the ROI is represented as an array of four elements:
Calculate ROI Dimensions:
- Calculates the width and height of the selected ROI:
- Width = Right coordinate - Left coordinate
- Height = Bottom coordinate - Top coordinate
- Calculates the width and height of the selected ROI:
Allocate Color Array:
- Allocates a new array filled with the selected color. The dimensions of this array are determined by the width and height of the ROI calculated in the previous step.
Replace Array Subset (Within DVR):
- The “Replace Array Subset” function (6), operating within the DVR’s Inplace Element Structure, modifies the pixel data of the original image.
- Important Note: For image data within a DVR, the row and column indexing be rotated compared to a standard LabVIEW image.
Release Data Value Reference (DVR):
- The “Delete Data Value Reference” function (7) releases the DVR.
- Crucial: It is essential to close (delete) DVRs when you are finished with them. Failure to do so can lead to unexpected behavior and potential issues with data integrity and memory management.
Draw Image to Control:
- The modified image (now with the ROI filled with the selected color) is drawn again onto the “Image” control, updating the displayed image with the changes made within the DVR.